
DIY: Bedside Table Make Over
My bedside tables were looking really worn and the stain was coming off and it was one of those jobs I never had time to do. While in lock down I decided to change the look of my bedsides by painting them grey in chalk paint. I absolutely love how they turned out so I thought I would share it with you. Now you should know that I have no patience at all and I’m not crafty so if I can do it, then it must be pretty easy. I usually start projects and give up on them because they don’t turn out like on the television shows but this one I actually completed.
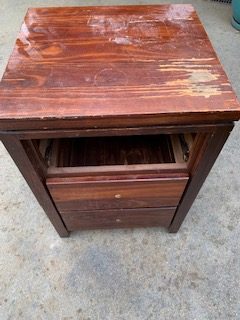
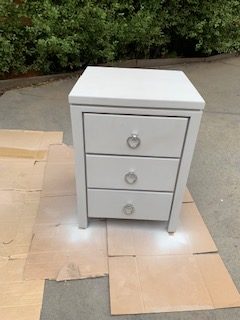
Before: My bedside table was really worn and it looked horrible.
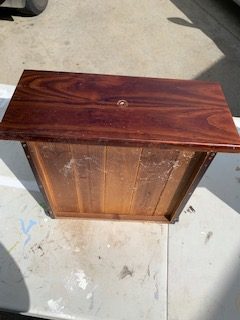
Step 1 – Remove the handles:
I removed the handles so the bedside was ready for me to sand it. I changed the handles recently so these ones were still good but if you don’t like your handles then this is a great way to freshen the look of your bedside tables.
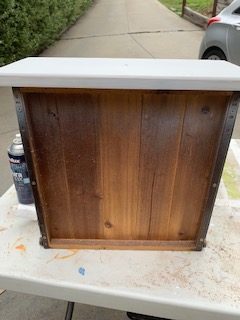
Step 2 – Sand the drawers and Bedside cabinet:
I put some trestle tables up in our drive way so I could put the drawers on them and reach them easier without bending over. It was quite easy to sand the drawers and the cabinet but it did take about 30 minutes to sand one bedside cabinet. I used a sander similar to this one form Mitre 10. https://www.mitre10.com.au/bosch-160w-multi-sander

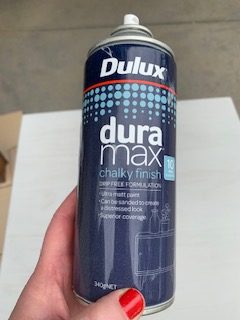
Step 3 – Painting & wax finish:
Once I sanded and wiped away the dust I was ready to paint. I chose a chalk paint in a can because I think it is so much easier to spray paint than to use a brush and it also gives you a better finish. I haven’t used a chalk paint before but I found this so easy to use so I would definitely recommend it. Remember I am not crafty so if it was too hard there is no way I would recommend it. This was really easy! The colour I chose was called ‘Riviera Grey’ and I really love it. I sprayed the first coat and left it to dry for about an hour and when it was touch dry I then applied the next coat. Once this was dry I added a wax which makes it feel smooth and it has a matt finish that also protects it.


Step 4 – Put handles back on:
The last thing to do is to put back the handles on. I am so happy with how this bedside cabinet looks. I really love it. It has taken me a couple of hours all up but a lot of this time was waiting for the paint to dry so it’s a good project to do in an afternoon at home.
Yay I finished it and I love it!
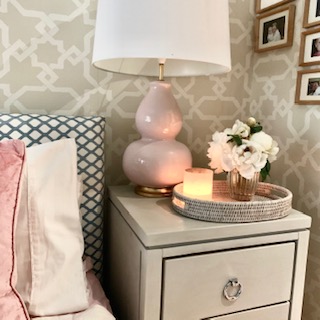

This is the refreshed bedside table in my bedroom. This change has made such a different to the look of my room and I am sorry I didn’t do it earlier. It really was quite an easy project and I’m thrilled with the end result.
I would love to hear from you about your experience in painting furniture.
I hope you are inspired to create a home you love. Andrea. xxx


